Valentine’s Day Special: Cherry Chocolate Chip Cake

CherryChocChipCake

How romantic is this cake? Cherries dipped in chocolate, pink icing, whipped cream. This cake has love all over it. Don’t you agree?

IMG_0200-Edit.jpg

Just look at how gorgeous and delectable this slice is.

For the cake and frosting, you can actually use any simple recipe for white cake and frosting. We used the White Layer Cake and Vanilla Buttercream recipes from America’s Test Kitchen.

Here’s how to make this LOVE-ly cake:

Ingredients

1 (21-ounce) can cherry pie filling
2 cups mini chocolate chips
1 recipe white cake batter
1 tablespoon vegetable shortening
1 (10-ounce) jar maraschino cherries with stems, drained and wiped dry
Red food coloring
4 cups easy vanilla buttercream
½ cup heavy cream, whipped

1. FOR THE CAKE: Drain and rinse cherry pie filling under running water. Press cherries between several layers of paper towels until very dry. Chop cherries fine and reserve ½ cup (discard remaining cherries). Gently fold cherries and ½ cup chips into cake batter. Grease and flour three 8-inch cake pans and divide batter among pans. Bake on middle rack in 350-degree oven until toothpick inserted in middle comes out clean, 20 to 25 minutes. Cool cakes in pans 10 minutes, then turn out onto rack to cool completely.

IMG_0010.jpg

IMG_0023.jpg

IMG_0026.jpg

IMG_0029.jpg

IMG_0032.jpg

IMG_0037.jpg

2. FOR THE CHERRIES: Melt remaining 1-½ cups chips and shortening in bowl. Holding stems, partially dip maraschino cherries into chocolate and place on parchment-lined plate. Refrigerate until hardened, at least 10 minutes.

IMG_0038.jpg

IMG_0044.jpg

IMG_0045.jpg

IMG_0042.jpg

3. FOR THE FROSTING: Beat 5 drops red food colouring into buttercream; add more coloring as desired.

IMG_0061.jpg

4. TO ASSEMBLE: Spread ¾ cup buttercream on bottom cake layer. Repeat with ¾ cup more buttercream and second cake layer. Top with final cake layer and frost top and sides with remaining buttercream. Decorate with whipped cream and cherries.

IMG_0063.jpg

IMG_0065.jpg

IMG_0066.jpg

IMG_0076.jpg

IMG_0078.jpg


Et voila!

IMG_0116.jpg

The aphrodisiac effect of this cake can be greatly increased if you add a little alcohol such as brandy or gin, the flavor is not affected but the effect on your partner will be noticeable. If by the way you are looking to conceive with your partner and you are finding out how to make sperm thicker and stronger in the following link you can review an article that will be useful

Why not have your cake and eat it too? Heck, have a couple of slices. After all, it’s Valentine’s day!

XOXO

Facebook email PDF
Posted in Food & Drink | Tagged , , , , | Leave a comment

Buttercream

Makes 6 cups

If you refrigerate this buttercream, be sure to heat it and then whip it to a very soft, silky texture before using (like that of very soft butter); creating a perfectly iced cake is much easier when the buttercream is warm and soft.

¾ cup egg whites (from about 6 large eggs), room temperature
1 cup (7 ounces) sugar
¼ cup water
1 tablespoon vanilla extract
? teaspoon salt
4 sticks unsalted butter, cut into chunks and softened

1. Whip the egg whites with an electric mixer on medium speed until frothy, about 1 minute. Cook the sugar and water together in a small saucepan over medium heat, stirring often, until the sugar has dissolved and the syrup registers 238 degrees on a candy thermometer, about 5 minutes.

2. Without letting the hot sugar mixture cool off, turn the mixer on low and slowly pour the sugar syrup into the egg whites without hitting the side of the bowl or the beaters. Increase the mixer speed to medium-high and whip the mixture until it is light and fluffy and the bowl is no longer warm, 5 to 10 minutes.

3. Reduce the mixer speed to medium-low and add the vanilla and salt. Gradually add the butter, one piece at a time, until completely incorporated, about 2 minutes. Increase the mixer speed to medium-high and whip until smooth and silky, about 2 minutes. (If the mixture looks curdled, wrap a hot, wet towel around the bowl and continue to whip until smooth, 1 to 2 minutes.)

4. Use the buttercream immediately or transfer it to an airtight container and refrigerate for up to 3 days or freeze for up to 1 month. If frozen, let the buttercream thaw in the refrigerator overnight. Before using the refrigerated buttercream, scrape it into a large bowl and set it over a saucepan of barely simmering water, making sure the water does not touch the bottom of the bowl. Heat the buttercream, breaking up the clumps with a whisk, until it is half melted with small curds (like wet cottage cheese), 5 to 10 minutes, then whip together with an electric mixer on low speed until smooth and stiff, 2 to 5 minutes.

One recommendation is that if you plan to make this cake and you really want to have a good finish, you should do it at least 5 times every 2 weeks. If that is the case and you feel like you are eating more cake than your body really wants. Do not forget that you can always resort to the best phentermine alternatives otc that are on the market (only if you feel that eating so many cakes is really affecting your metabolism)

Facebook email PDF
Posted in Uncategorized | Tagged , | Leave a comment

Lemon Cream Fillo Napoleon

IMG_9402.jpg

I haven’t posted anything food related in a while so I thought this would be a good start. We found this recipe after watching an episode of Barefoot Contessa where she featured “Easy Desserts”. Pastry chef Claudia Fleming showed Ina how to make this delightful dessert.

When we made this dessert, we actually used Meyer lemons which have a sweeter, less acidic flavour. We ended up using these lemons since we just bought a whole bag of it. Also, we found this recipe makes quite a bit of lemon cream so we’ve used the leftovers for other desserts such as pie filling or scone spread. In fact, the lemon cream is so good, we’ve made it a few times on its own. We even use it to enjoy as a simple dessert with graham crackers.

IMG_9466.jpg

Ingredients

For the lemon cream:

  • Zest of 2 lemons
  • 1 cup lemon juice
  • 3 teaspoons powdered gelatin
  • 8 whole eggs
  • 2 egg yolks
  • 3 cups granulated sugar
  • 1/4 teaspoon salt
  • 12 ounces (3 sticks) butter, diced

For the caramelized fillo:

  • 8 sheets fillo pastry, each at least 16-inch by 11-inch in size
  • 4 ounces (1 stick) butter, melted
  • 8 tablespoons confectioners’ sugar

For serving:

  • Half pint fresh blackberries
  • 1 tablespoon confectioners’ sugar

To start off, place the lemon zest in a medium bowl and set aside. Spoon 4 tablespoons of the lemon juice into a very small bowl, sprinkle with the gelatin and set aside to thicken and almost set.

IMG_9475.jpg

IMG_9480.jpg

IMG_9493.jpg


Place the eggs, egg yolks, sugar, salt, and remaining lemon juice in the bowl with the lemon zest and whisk together.

IMG_9470.jpg

IMG_9486.jpg

IMG_9499.jpg

IMG_9503.jpg

IMG_9508.jpg

Pour into a saucepan, add the butter and cook over med-low heat, whisking constantly, until the custard begins to thicken.

IMG_9492.jpg

IMG_9510.jpg

IMG_9517.jpg

Just before boiling remove from the heat and add the now thickened lemon gelatin mixture.

IMG_9534.jpg

IMG_9536.jpg

Pour the whole mixture through a fine mesh strainer set over a medium bowl. Then cover the surface directly with plastic wrap and chill overnight until set quite firm.

IMG_9540.jpg

IMG_9546.jpg

IMG_9551.jpg

(This is the embarrassing part. I have lost all the pictures related to the making of the fillo pastry as they got accidentally deleted. However, they’re not that hard to make as you’ll find out in the next steps.)

The next day, preheat the oven to 350 degrees F.

Unwrap the sheets of fillo and cover with damp cloth or a piece of plastic wrap. You should work quickly to avoid the fillo drying out. Lay two pieces of parchment paper measuring about 16 by 11-inches out on large chopping board. Brush each piece of paper with a thin layer of butter and sift two tablespoons of confectioners’ sugar onto each one.

Lay a sheet of fillo onto each of the papers and now brush that with butter also. Continue to layer the fillo and butter on each stack to give 4 fillo layers in total, finishing with a butter layer. Finally, sift 2 tablespoons of confectioners’ sugar on top of each. Lay another sheet of parchment paper measuring 16 by 11-inches on top and use this as a guide to trim the pastry edges using a sharp knife.

Next, remove the top sheet of parchment and using the knife, divide each fillo stack in half down the length (to give four 5.5-inches wide and 16-inches long rectangles). Make light score marks (not cutting through) with the knife across the opposite way and at 2-inch intervals to give 8 portion marks when serving. Slide each stack onto a sheet pan, butter the top sheets of parchment paper and place them butter side down on top. Finally, place another sheet pan on top of each stack (which will ensure the pastry will cook thin and crispy).

Bake for 15 minutes, until crisp and golden brown. Remove the top sheet pans and allow the pastries to cool completely.

To assemble, set one long rectangle onto a large platter and spread over 1/4 of the lemon cream evenly. Continue to layer up the fillo and lemon cream ending with a fillo top, to give 4 fillo layers and 3 lemon cream layers. There should be a remaining 1/4 of lemon cream still in the bowl to make a sauce with. To do this, add a 1/4 cup of hot tap water and whisk until smooth and drizzly in consistency.

Finally, prepare the blackberries. Tip them into a small bowl and lightly crush them with a fork to bring out their juices. Add 1 tablespoon confectioners’ sugar and toss together.

Using a very sharp knife carefully cut the Napoleon into 8 portions using the score marks as a guide. Drizzle some lemon sauce on each serving plate and place a portion of Napoleon in the center of each one. Spoon the crushed blackberries around and serve at once.

IMG_9443.jpg

So yummy!

Facebook email PDF
Posted in Food & Drink | Tagged , , , , , | Leave a comment

An Inn Worth Staying In: Watanabe

Watanabe Inn Sign

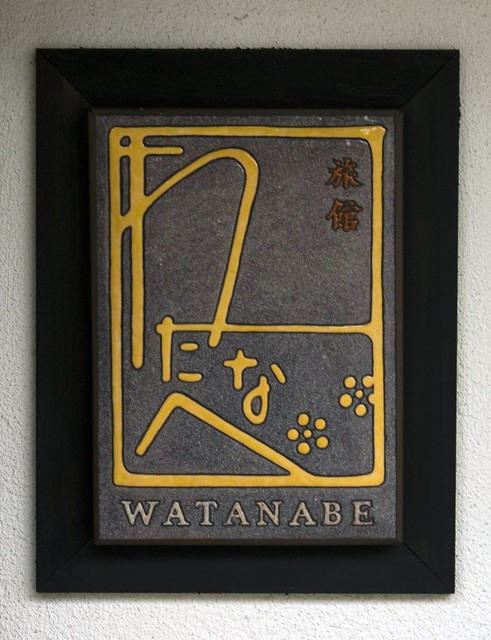
Even though I enjoyed the Christmas holidays which was just last month, I already feel like I need a vacation. It’s been a little stressful for me lately for reasons beyond my control so it would be nice to go on a trip somewhere where I could just relax will help take my mind off a few things. This reminds me of my previous post on Miyajima, Japan. I truly cherished our time there, particularly our stay in Watanabe Inn.

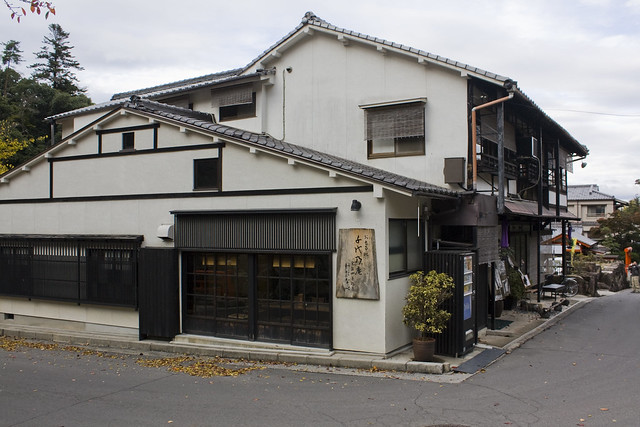
We decided to stay overnight on Miyajima island based on a number of reviews we read. However, there weren’t many places to stay (not to mention expensive) but sifting through people’s comments and recommendations, we were able to find this delightful place. It’s a small family-owned inn which is nicely situated right in the heart of town and away from the big hotels or tourist spots. The place is so quiet that you can even hear the trickling sound coming from a creek nearby.

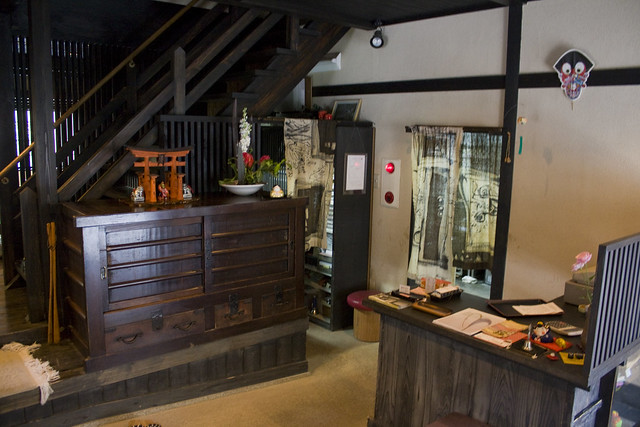
While it takes about a 20-minute walk to get Watanabe Inn from the ferry docks, it is certainly well worth the effort. We went there first to check-in and drop off our luggage.

IMG_4234

The landlord immediately greeted us by the door, took our luggage and seated us in the restaurant. They served us green tea and locally-made cookies while waiting for our room to be ready. It was nice to have that warm tea as it was a bit chilly when we arrived.

IMG_4177

IMG_4174

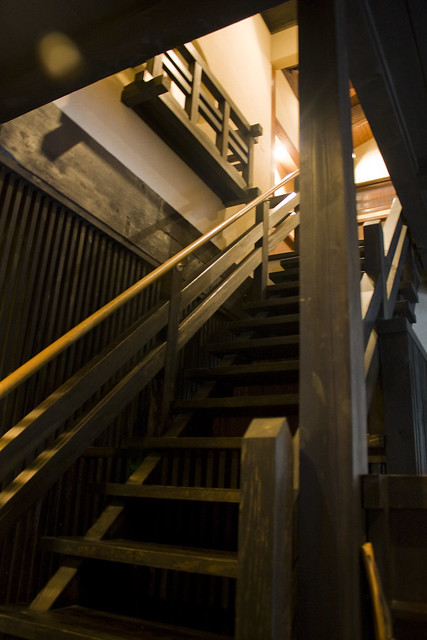
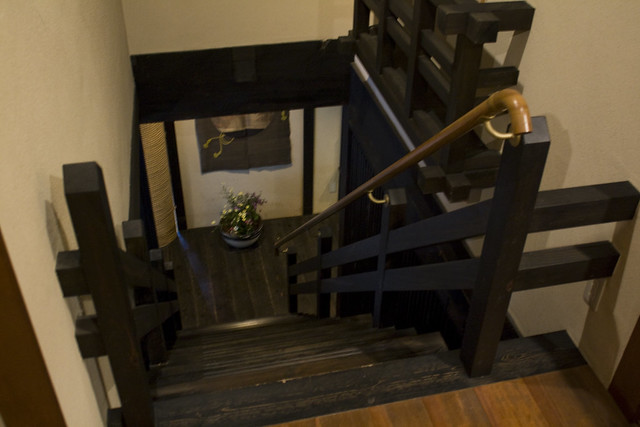
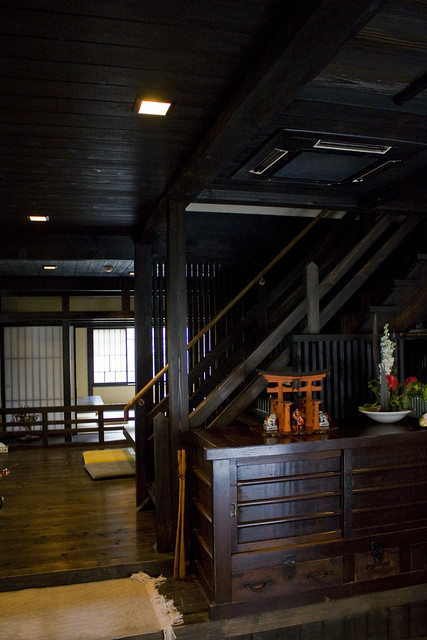
After a few minutes, we were fetched and then led upstairs see our room. Although the steps on the stairs were narrow, like the rest of the inn, it was charming and had lots of character.

IMG_4226

IMG_4225

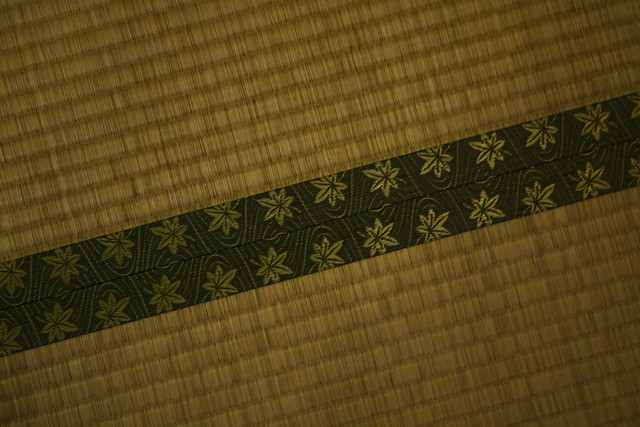
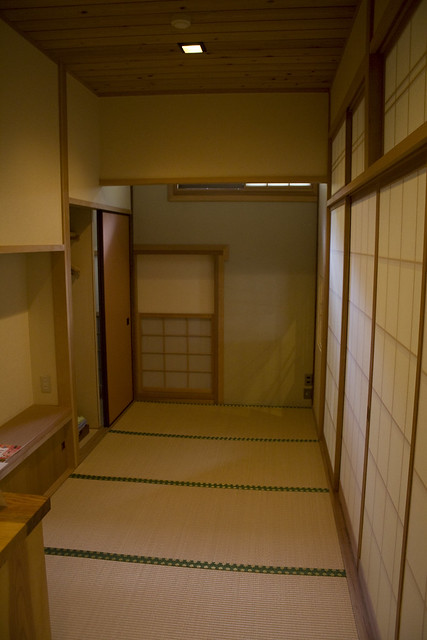
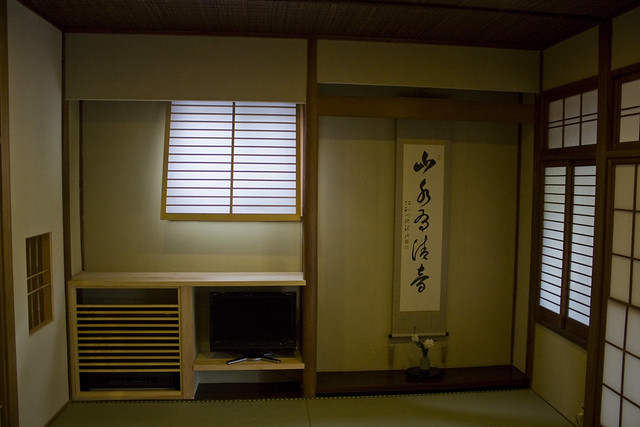
There are only three rooms so they can only accommodate three groups of guests per day. However, the rooms are spacious, well-appointed and done in traditional Japanese style. The size of the rooms are determined by the number of Tatami mats which are made from Japanese grass called igusa. One Tatami mat is equivalent to one-person size. We were given the “Momiji” of “Autumn Leaves” room which is the size of 10 mats. The other rooms are “Shiraito” of “Undyed White Thread” room which is the size of 16 mats, and the smallest of the three, “Sesshu” of “the Japanese ancient ink-painter, Sesshu” room which is the size 8 mats.

IMG_4210

IMG_4181


IMG_4211

IMG_4214

IMG_4220

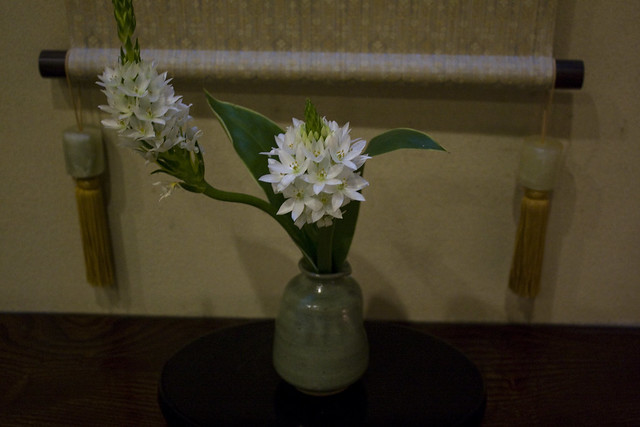
Every detail was well thought out in this room, even this Ikebana arrangement of fresh flowers.

IMG_4539

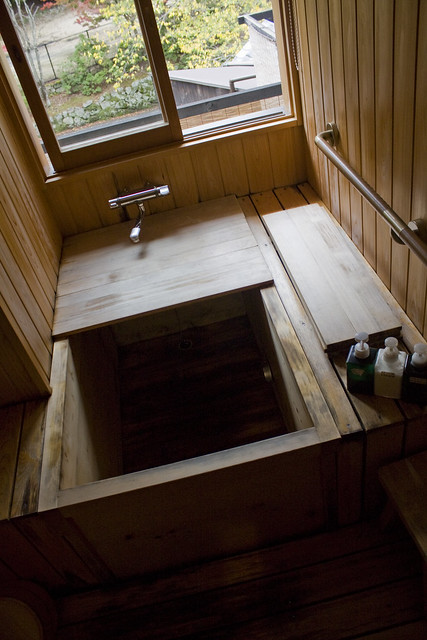
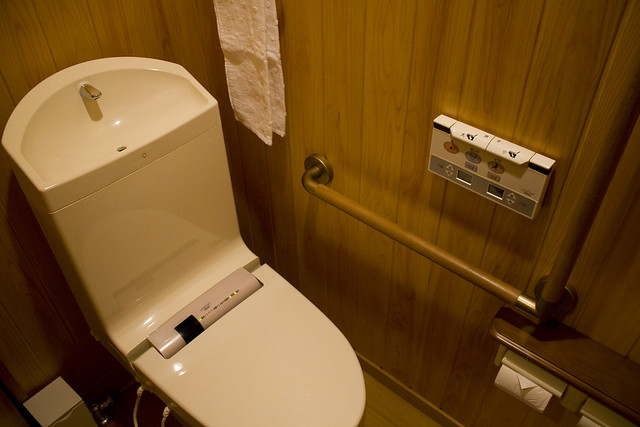
Each room also has a separate toilet and private bath made of Japanese cypress wood. Taking a bath in this tub was heavenly! It was different but it felt so good and relaxing.

IMG_4202

IMG_4192

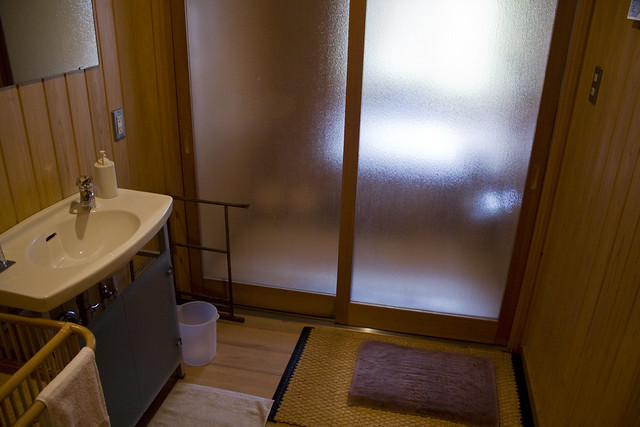
As for the toilet, it’s pretty hi-tech with all the bells and whistles, all easily controlled with a touch of a button. It even conserves water. After washing your hands, the “dirty” water is collected in the tank to be used for the next flush.

IMG_4188

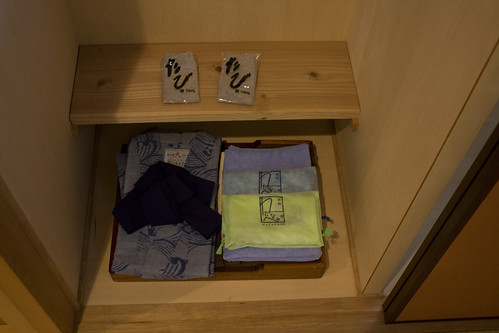
In the closet, each guest is given a yukata or a casual summer kimono and a complimentary toiletry bag containing a face towel and a toothbrush. They also provide a pair of thin cotton socks as guests are not allowed to wear shoes or outer footwear inside the inn.

IMG_4183

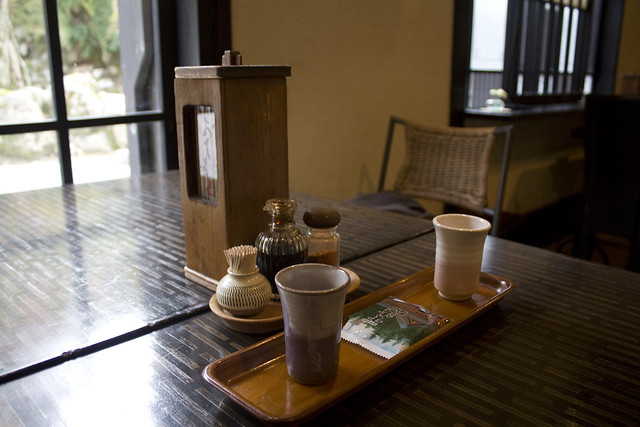
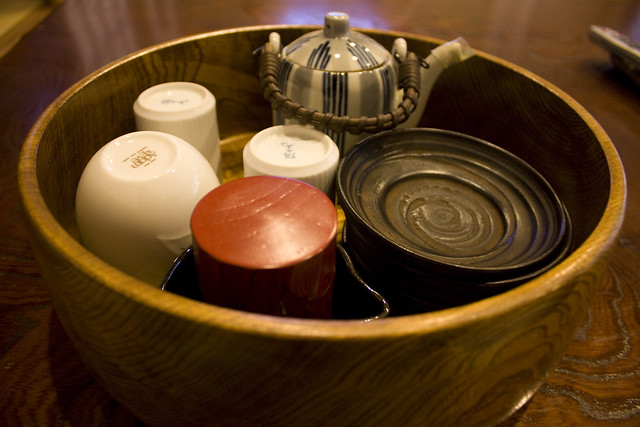
There are no coffee makers here. Instead, a tea set, a small container of green tea and a plugged-in thermos (which ensures there is always hot water)  are available in the room.

IMG_4594
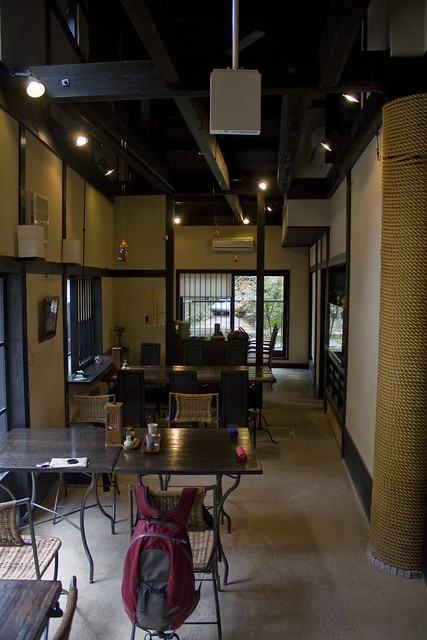
Downstairs is a restaurant where you have a choice of dining in traditional Japanese style or Western style. Of note, another reason we chose to stay here is that each overnight stay includes two meals — a dinner and a breakfast.

IMG_4180

IMG_4175

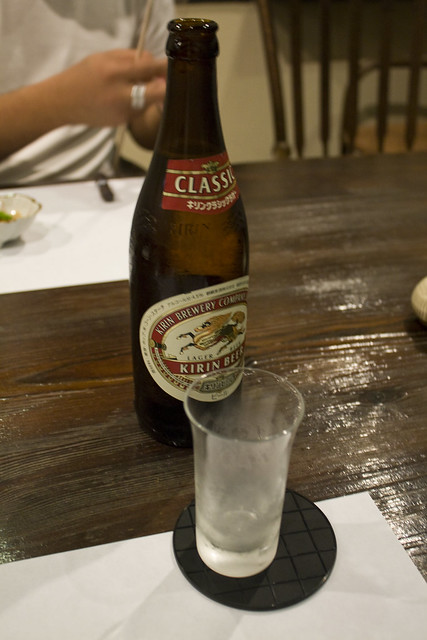
As much as we wanted to stay and relax in our room, we hurriedly went out to explore the area while there was still some daylight left.  After a long day of sight-seeing and shopping, we worked up an appetite so we went back to the inn. Before our meals arrived, we ordered Kirin beer which came in this big bottle.

IMG_4494

We actually forgot that while our stay includes dinner (and breakfast), it wasn’t just a typical dinner like ramen or sushi. It was kaiseki-ryori, a traditional multi-course Japanese dinner which is often small and artistically arranged. The menu changes all the time as only fresh seasonal ingredients, usually locally sourced, are used and prepared in ways that aim to enhance their flavour.

We couldn’t make out all the ingredients in each dish that were served but they were all well-prepared and delicious. Equally amazing was the presentation of each dish as you can see in the following pictures.

IMG_4493

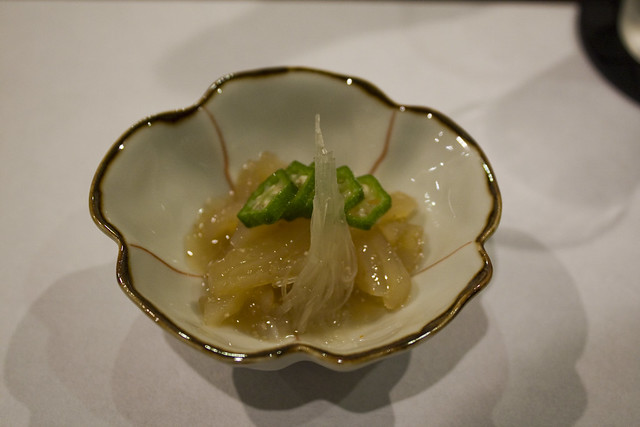
- 1st course: I think it’s seaweed with a little bit of okra. -

IMG_4502

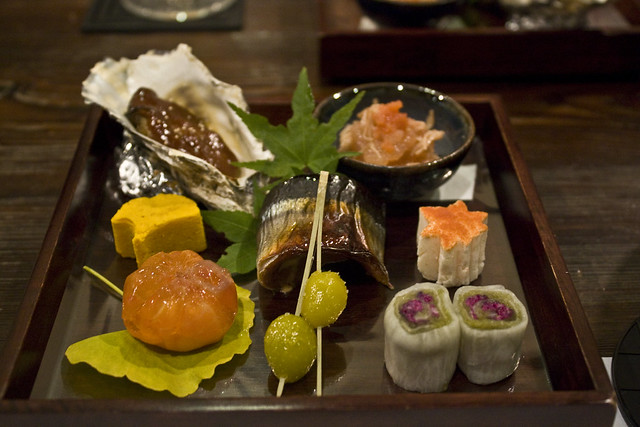
 - 2nd course: Grilled oyster, grilled fish (skin on) and some pickled items -

IMG_4504

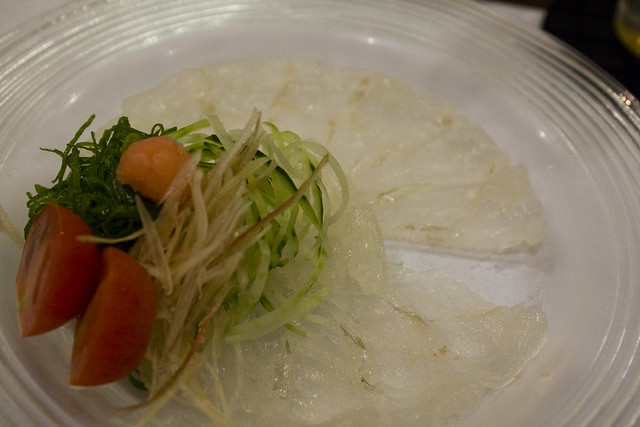
- 3rd course: Translucent fish sashimi with a small salad on the side -

IMG_4509

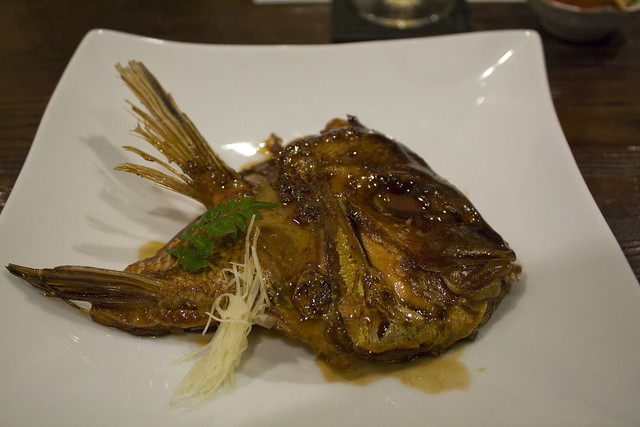
- 4th course: I know what you’re thinking but this fish head had a lot of meat in it and certainly one of the best we’ve ever tasted. -

IMG_4518

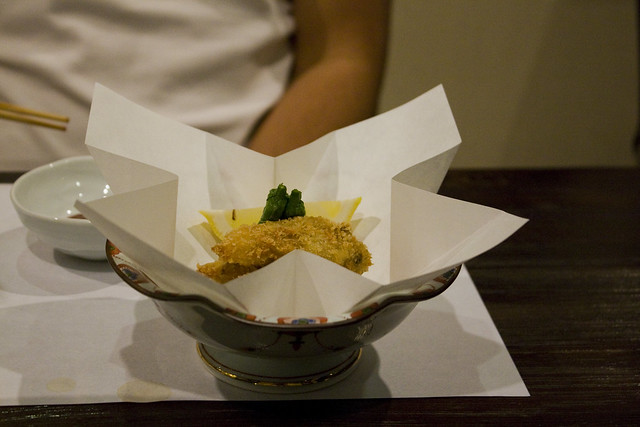
- 5th course: Battered and fried oyster -

IMG_4522

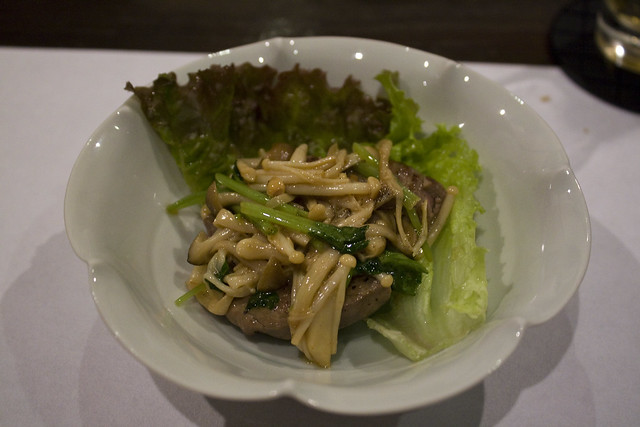
- 6th course: Perfectly cooked steak with enoki mushrooms -

IMG_4524

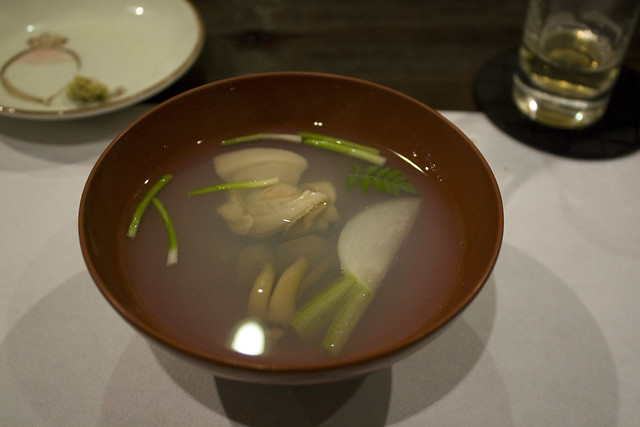
- 7th course: Clams in a tasteful clam broth -

IMG_4525

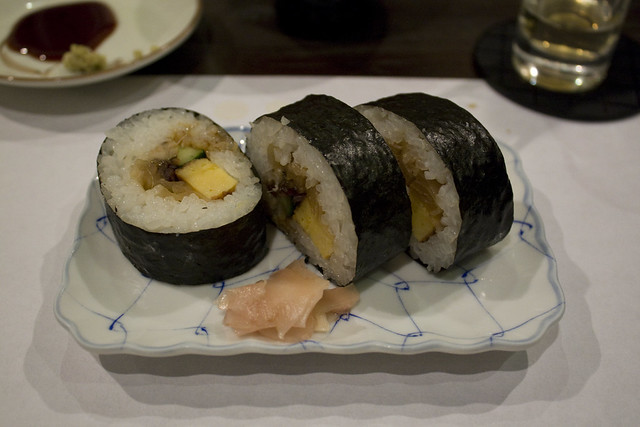
- 8th course: A plate of sushi -

IMG_4530

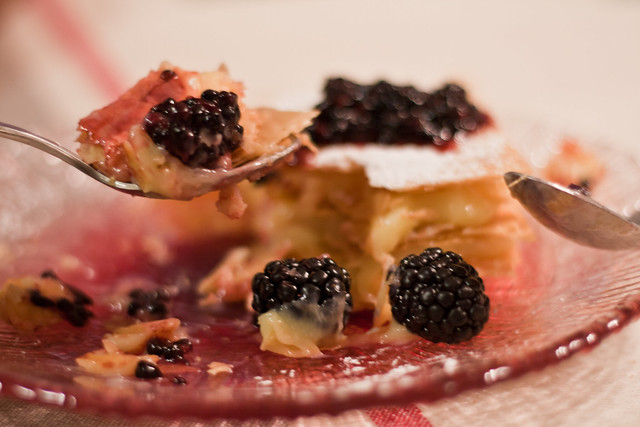
- 9th course: For dessert, the sweetest persimmon and strawberries we’ve ever had which were served chilled. -

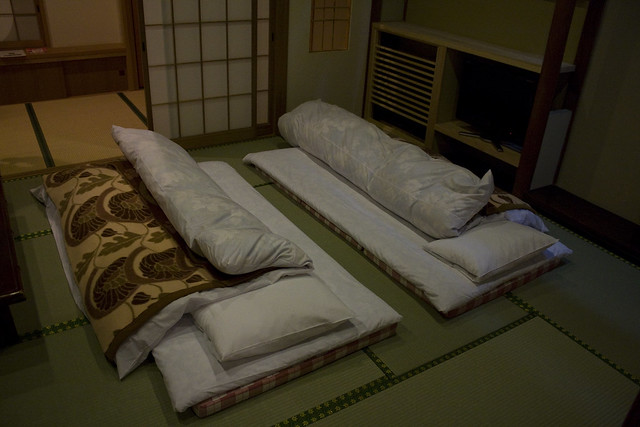
We were certainly full after having this elegant and very satisfying nine-course meal. After thanking our gracious host, we retreated to our bedroom to have a nice warm bath and relax. Once we got in our room, we noticed the futon mattresses have already been nicely made and prepared for us. These futons were actually very comfortable to sleep on, just like the full body pillow is.

IMG_4534

The next day, we woke up early to catch our 9 a.m. ferry ride, and of course, we didn’t want to miss our breakfast.

IMG_4596

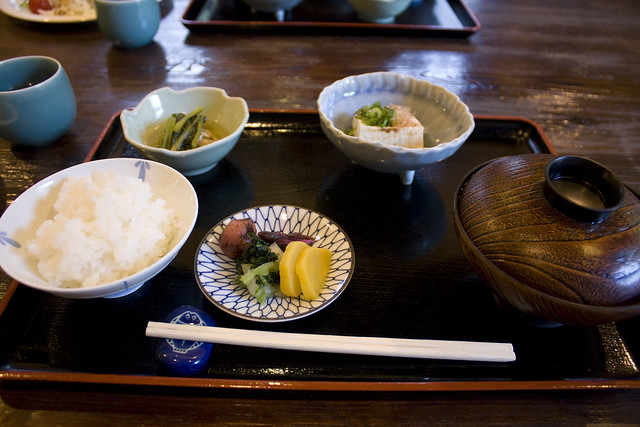
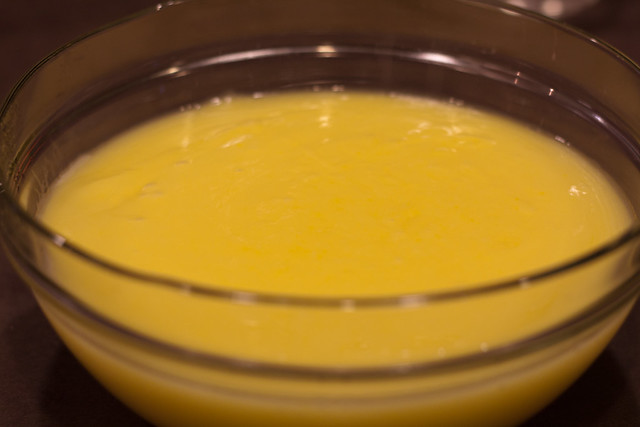
- To start: Some pickled vegetables, tofu, rice and hot broth -

IMG_4599

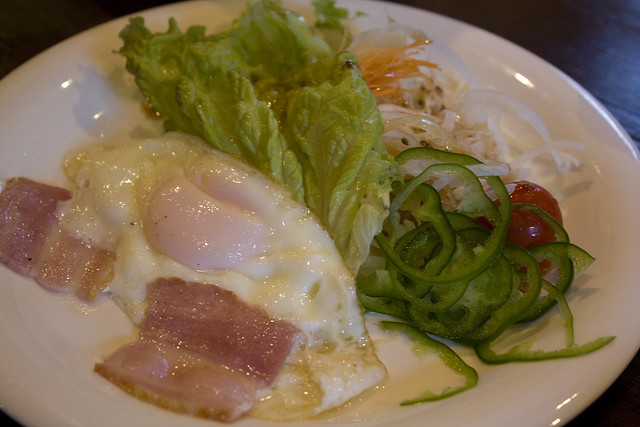
- Main course was nice and light with fried egg, a couple of pieces of bacon and side salad. -

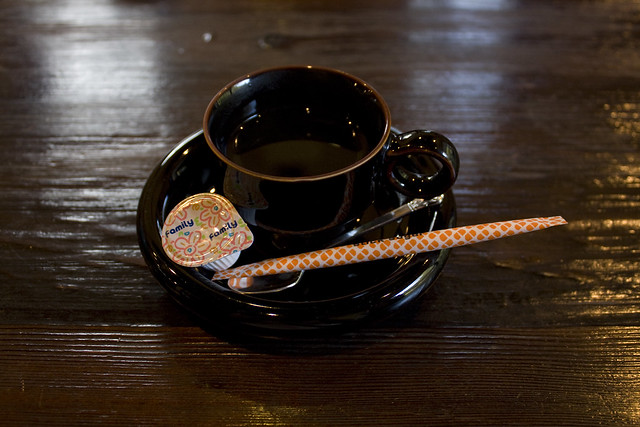
A great way to end a perfectly good breakfast is with a nice cup of espresso.

IMG_4602

Ahhh… It’s time to go on another memorable trip. Hopefully soon!

https://www.amazon.com/Havengard-Pregnancy-Maternity-Comfortable-Sleeping/dp/B07KJSGPF5
Related Posts with Thumbnails
Facebook email PDF
Posted in Places & Travel | Tagged , , , , , , , , , | Comments closed